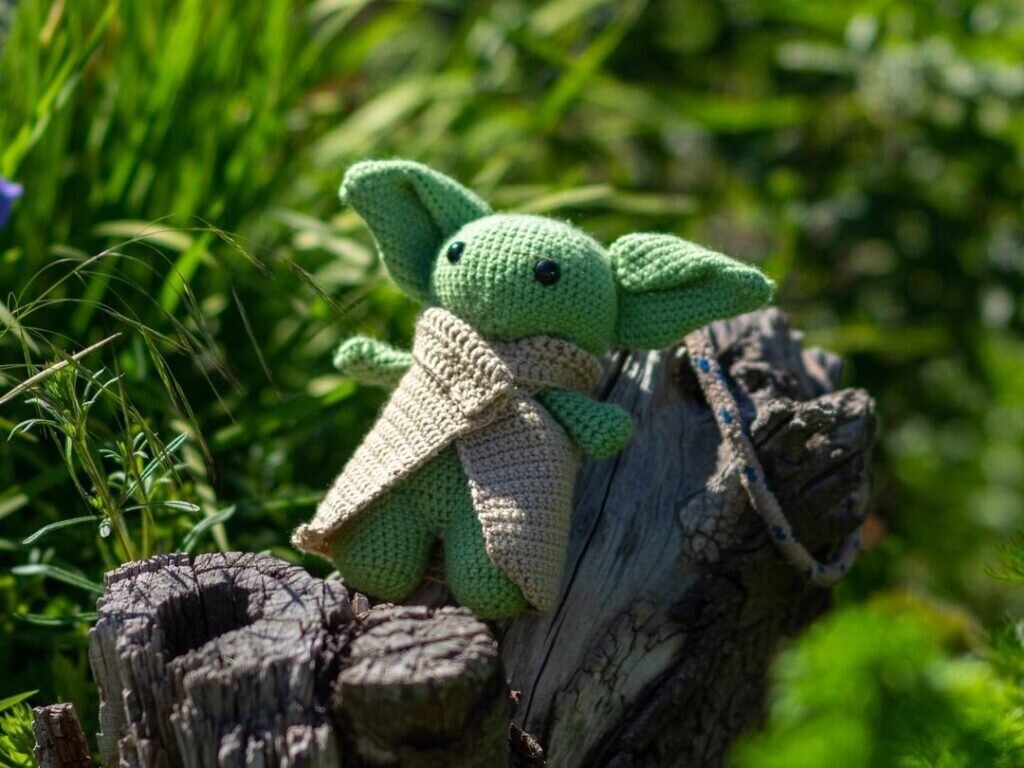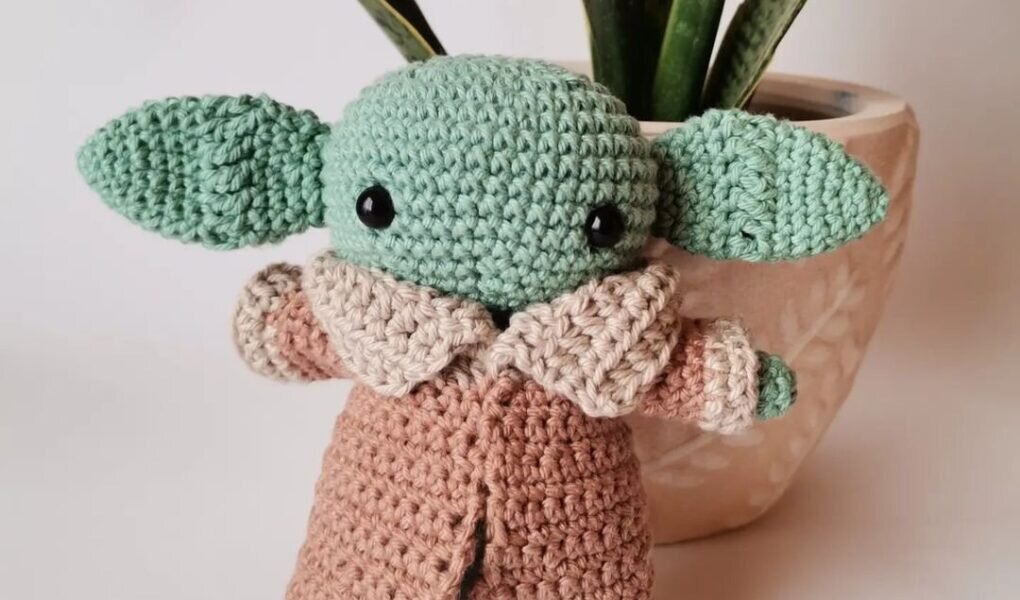
Baby Yoda Inspired Free Crochet Pattern
Hello dear Amigurumi enthusiasts! Today I would like to share with you a free Amigurumi Free Pattern pattern and construction instructions. Amigurumi has become a popular hobby in the world of craftsmanship, and in this article I will present you a great Amigurumi Free Pattern design. Trust your imagination while doing amigurumi. And dare to create your own unique designs. Welcome to the Amigurumi world, enjoy fun handicraft projects.
Basic Pattern Information
Size:
Height: 4.75 inches (12 cm)
Level:
★★☆☆☆ Easy / Beginner
Requires stitches used (below), attaching yarn, and sewing parts together.
Stitches/Terms Used (US Terminology):
FO: fasten off
MR: magic ring
Ch: chain
Sl st: slip stitch
Sc: single crochet
Inc: increase
Dc: double crochet
Fdc: foundation dc (video tutorial available)
Materials:
* Medium weight (4) yarn in green, light brown, and dark brown
* 2.75mm crochet hook (for all body parts)
* 3.75mm crochet hook (for all clothing pieces)
* 10mm plastic safety eyes
* Scissors
* Blush Powder
* Q-Tip
Crochet Instructions
Important Notes (Read before beginning!)
* Use the 2.75mm hook and green yarn for all body parts (head, arms, legs, body).
* Use the 3.75mm hook for all clothing pieces (collar, jacket). Use light brown yarn for the collar, and dark brown yarn for the jacket.
Head
R1: In MR, sc 6. (6 sts)
R2: Inc around. (12 sts)
R3: (Sc, inc) x 6. (18 sts)
R4: (Sc 2, inc) x 6. (24 sts)
R5: (Sc 3, inc) x 6. (30 sts)
R6-R7: Sc around. (30 sts)
R8: (Sc 4, inc) x 6. (36 sts)
R9-R10: Sc around. (36 sts)
R11: (Sc 4, dec) x 6. (30 sts)
R12: (Sc 3, dec) x 6. (24 sts)
R13: (Sc 2, dec) x 6. (18 sts)
FO and weave in the ends. Insert 10mm plastic safety eyes eyes between R8-R9, 8 stitches apart.
Ears (x2)
R1: In MR, sc 4. (4 sts)
R2: (Sc, inc) x 2. (6 sts)
R3: (Sc 2, inc) x 2. (8 sts)
R4: (Sc 3, inc) x 2. (10 sts)
R5: (Sc 4, inc) x 2. (12 sts)
R6: (Sc 3, inc) x 3. (15 sts)
R7: (Sc 4, inc) x 3. (18 sts)
R8: Sc around. (18 sts)
FO with a long tail for sewing later.
Arms (x2)
R1: In MR, sc 6. (6 sts)
R2-R8: Sc around. (6 sts)
FO with a long tail for sewing later.
Legs (x2) & Body
LEGS (x2):
R1: In MR, sc 6. (6 sts)
R2: Inc around. (12 sts)
R3: Sc around. (12 sts)
R4: Sc 4, dec 2, sc 4. (10 sts)
R5-R7: Sc around. (10 sts)
FO for the first leg, but do not FO for the second. Continue with R1 of the ‘Body.’
BODY:
R1 (Joining Row): Holding the second leg you made, ch 3. Join with a sc to the first leg, then sc 9 around
that leg. Sc 3 across one side of the chain. Sc 10 around the second leg. Sc 3 across the other side of the chain. (26 sts)
R2-R6: Sc around. (26 sts)
R7: (Sc 11, dec) x 2. (24 sts)
R8: (Sc 6, dec) x 3. (21 sts)
R9: (Sc 5, dec) x 3. (18 sts)
FO with a long tail for sewing later.
Collar (Scarf)
Fdc 24. (Starting ch is included as a dc.)
FO with a long tail for sewing later.
Jacket
BODY PANELS:
R1: Fdc 22. (Starting ch is included as a dc.)
R2: Ch 3 (counts as first dc). Dc across. (22 sts)
R3: Ch 3, dc 8. Ch 3, sl st in next st. Sl st 2. Sl st, ch 3. Dc in next st. Dc 8.
FO and weave in the ends. Fold your body panels in half, so that instead of being 22 sts in height, it is now 11 sts. Sew the bottom 6 sts together. The last 10 sts would be unworked for now as the sleeve holes. Sew the back of both body panel pieces together, leaving the front flaps open. Continue with the ‘Sleeves’ section below.
SLEEVES:
Attach yarn to the armhole.
Ch 3, dc around. Join with a sl st to the first dc. (10 sts)
FO and weave in the ends. Repeat on the other side.
Finishing Instructions
- Stuff the head and body well. Using a yarn needle, sew both arms to the body.
- Crease the top edge of the ears and sew them to both sides of the head.
- Sew the head to the body. Make sure to add any final bits of stuffing before sewing the opening shut.
- Help Baby Yoda wear his jacket, and then his collar/scarf. You may use the long tail end of the collar to stitch it in place.
- Finally, add blush to Baby Yoda’s cheeks and the insides of his ears using blush powder and a q tip.
It's All Finished: