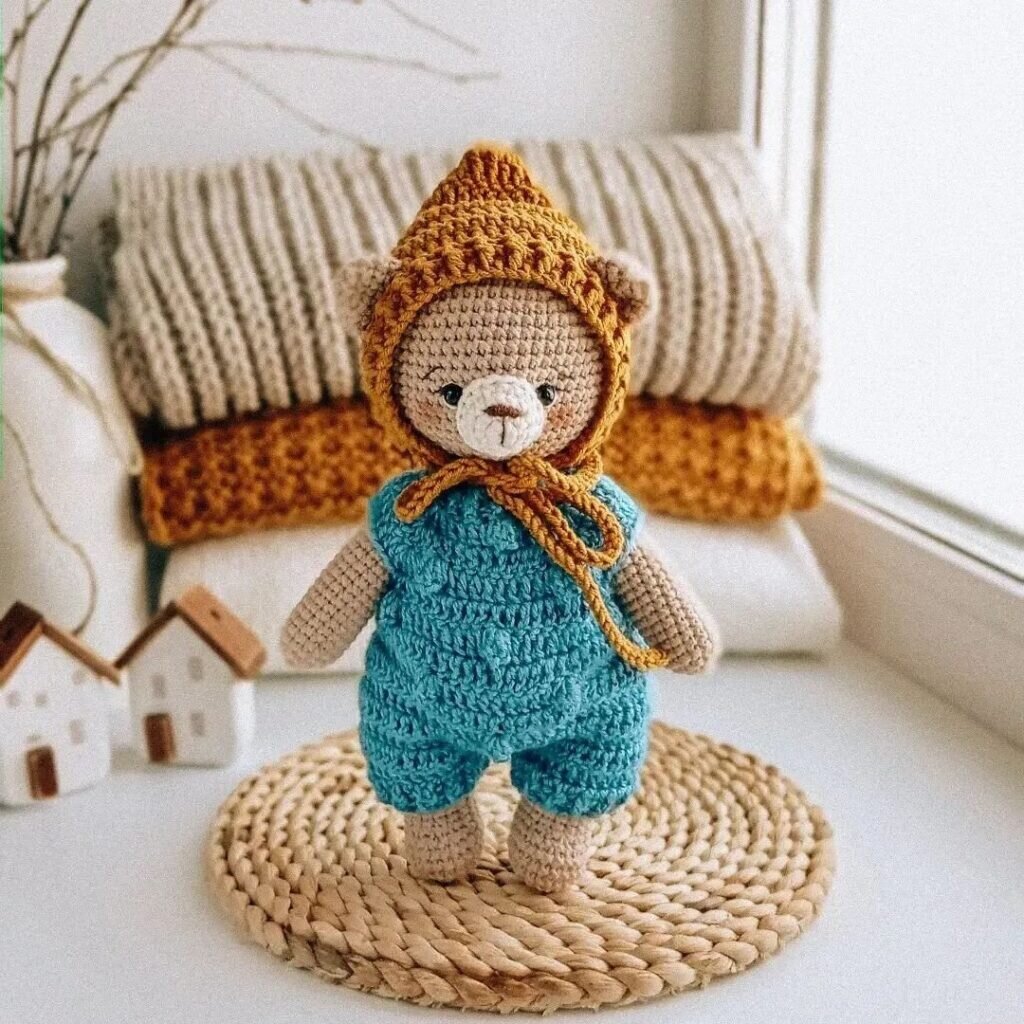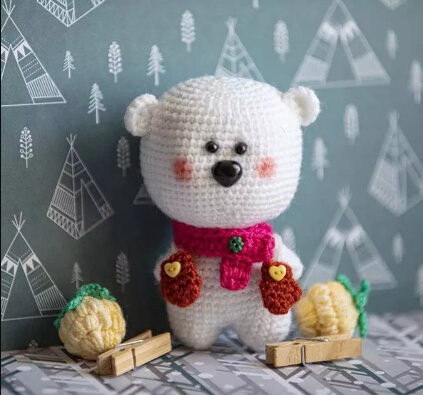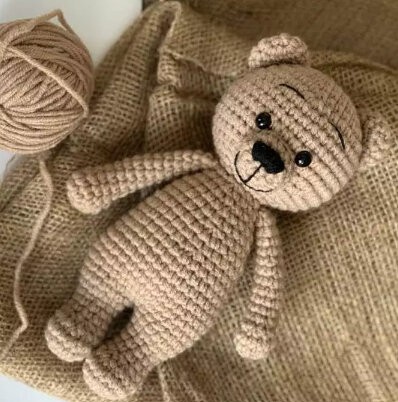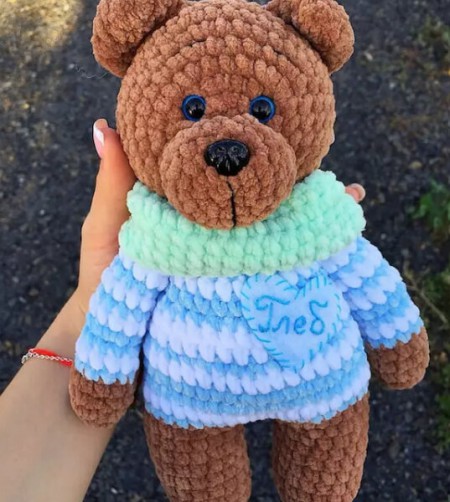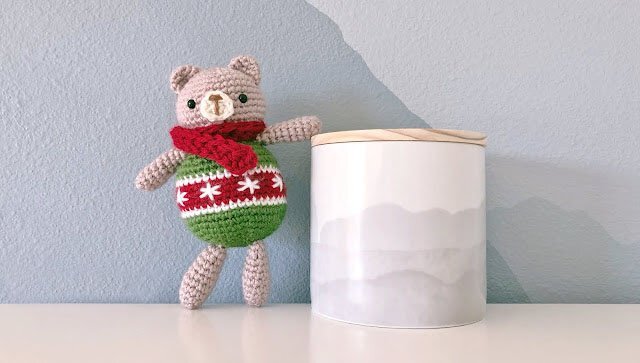
Ornament Bear Free Crochet Pattern
Hello dear Amigurumi enthusiasts! Today I would like to share with you a free Amigurumi Bear pattern and construction instructions. Amigurumi has become a popular hobby in the world of craftsmanship, and in this article I will present you a great Amigurumi Bear design. Trust your imagination while doing amigurumi. And dare to create your own unique designs. Welcome to the Amigurumi world, enjoy fun handicraft projects.
Finished Measurement:
Height: 6.5 in (16.5 cm)
Level:
★★☆☆☆ Easy / Familiar Beginner
Requires familiarity with stitches used (below), changing yarn
colors, and sewing pieces together.
Stitches/Terms Used (US Terminology):
MR: magic ring
Sc: single crochet
Inc: increase
Dec: decrease
Fhdc: foundation half double crochet (video tutorial)
Materials:
Worsted medium weight (4) yarn in desired colors (I used brown, off-white, green, red, and white.
Refer to ‘Color Guide’ at start of pattern.)
* Scraps of dark brown yarn for sewing nose and mouth.
* 3.25mm crochet hook
* 6.00mm crochet hook
* Pair of 6mm plastic safety eyes
* Fiberfill stuffing
* Yarn needle
* Scissors
CROCHET INSTRUCTIONS
Important Notes (Read before beginning!)
* The 3.25mm crochet hook is used for all parts of the bear. The 6.00mm crochet hook is only used
for the scarf.
COLOR GUIDE
C1: Brown (bear head, ears, arms, legs)
C2: Off-white (bear muzzle)
C3: Green (ornament)
C4: Red (ornament, scarf)
C5: White (ornament)
HEAD
Begin with C1 yarn (brown) and the 3.25mm hook.
R1: 6 sc in MR. (6 sts)
R2: Inc around. (12 sts)
R3: (Sc, inc) x 6. (18 sts)
R4: (Sc 2, inc) x 6. (24 sts)
R5: (Sc 3, inc) x 6. (30 sts)
R6: (Sc 4, inc) x 6. (36 sts)
R7-R12: Sc around. (36 sts)
R13: (Sc 4, dec) x 6. (30 sts)
R14: (Sc 3, dec) x 6. (24 sts)
R15: (Sc 2, dec) x 6. (18 sts)
Fasten off and weave in the ends.
EARS (x2)
Begin with C1 yarn (brown) and the 3.25mm hook.
R1: 6 sc in MR. (6 sts)
R2: (Sc, inc) x 3. (9 sts)
R3: (Sc 2, inc) x 3. (12 sts)
Fasten off with a long tail for sewing to the head later.
MUZZLE
Begin with C2 yarn (off-white) and the 3.25mm hook.
R1: 6 sc in MR. (6 sts)
R2: (Sc, inc) x 3. (9 sts)
Fasten off and weave in the ends.
ARMS (x2)
Note: Lightly stuff the arms as you crochet.
Begin with C1 yarn (brown) and the 3.25mm hook.
R1: 6 sc in MR. (6 sts)
R2: (Sc, inc) x 3. (9 sts)
R3-R4: Sc around. (9 sts)
R5: Sc 7, dec. (8 sts)
R6: Sc around. (8 sts)
R7: Sc 6, dec. (7 sts)
R8: Sc around. (7 sts)
R9: Sc 5, dec. (6 sts)
R10: Sc around. (6 sts)
Fasten off with a long tail for sewing to the body later.
LEGS (x2)
Note: Lightly stuff the legs as you crochet.
Begin with C1 yarn (brown) and the 3.25mm hook.
R1: 6 sc in MR. (6 sts)
R2: (Sc, inc) x 3. (9 sts)
R3: (Sc 2, inc) x 3. (12 sts)
R4-R5: Sc around. (12 sts)
R6: (Sc 4, dec) x 2. (10 sts)
R7-R8: Sc around. (10 sts)
R9: (Sc 3, dec) x 2. (8 sts)
Fasten off with a long tail for sewing to the body later.
ORNAMENT BODY
Begin with C3 yarn (green) and the 3.25mm hook.
R1: 6 sc in MR. (6 sts)
R2: Inc around. (12 sts)
R3: (Sc, inc) x 6. (18 sts)
R4: (Sc 2, inc) x 6. (24 sts)
R5: (Sc 3, inc) x 6. (30 sts)
R6: (Sc 4, inc) x 6. (36 sts)
R7: (Sc 5, inc) x 6. (42 sts)
R8-R9: Sc around. (42 sts)
Switch to C5 yarn (white).
R10: Sc around. (42 sts)
Switch to C4 yarn (red).
R11-R14: Sc around. (42 sts)
Switch to C5 yarn (white).
R15: Sc around. (42 sts)
Switch to C3 yarn (green).
R16-R17: Sc around. (42 sts)
R18: (Sc 5, dec) x 6. (36 sts)
R19: (Sc 4, dec) x 6. (30 sts)
R20: (Sc 3, dec) x 6. (24 sts)
R21: (Sc 2, dec) x 6. (18 sts)
Fasten off with a long tail for sewing to the body later. Stuff well but be careful not to stretch the stitches.
SCARF
Begin with C4 yarn (red) and the 6mm hook.
Ch 3. Fhdc until the scarf is as long as you’d like it to be. (I crocheted 34 fhdc and my bear’s scarf
measured 9 inches in length to wrap twice around the neck.)
Fasten off and weave in the ends.
FINISHING INSTRUCTIONS
Part 1: Finishing the Head
- Insert plastic safety eyes into the bear’s head, leaving a gap in the middle for the muzzle. (I inserted
6mm eyes between R9-R10, 7 sts apart.) - Using some darker brown scraps of yarn, sew a horizontal line for a nose and a vertical line for the
mouth onto the bear’s muzzle. - Position the muzzle between the eyes and sew it to the head.
- Sew the two ears onto the bear’s head.
Part 2: Finishing the Body
1. Using white yarn, embroider a design such as a snowflake across the center of the ornament.
2. Sew the legs to the bottom of the ornament. (Note that the opening is on top.)
3. Sew the arms to both sides of the bear, near where the top opening is.
Part 3: Putting It All Together
1. Finally, sew the head and body together using the long yarn tail from the body. If needed, add
additional stuffing before closing up the opening.
2. Wrap the scarf around your bear’s neck, and sew it securely if desired.
3. Optional: Sew or fasten a loop to the top of the bear’s head. This way, he can be hung on a tree as an actual ornament.
It's All Finished: